
At-Home Acid Peels: How to Use Them Safely for Brighter Skin
You’re curious about at-home acid peels, and you’re asking exactly the right question: do they really work, and are they safe? As an esthetician, my goal is to give you the clear, trustworthy answers you need to make a confident choice for your skin.
By the end of this guide, you’ll know exactly how to navigate the world of at-home peels. You will:
- Understand how acid peels work and what they can realistically do for your skin at home.
- See the clear safety and effectiveness differences between your bathroom and a professional’s office.
- Feel empowered to choose a product and create a simple, safe routine if you decide an at-home peel is right for you.
With the right knowledge, you can approach this powerful skincare step with clarity and confidence.
How Do At-Home Acid Peels Actually Work on Your Skin?
Let’s get one thing clear from my treatment chair: an at-home acid peel is not the dramatic, skin-shedding event you see in movies. Think of it as a controlled, mild chemical exfoliant, especially when used for treating body acne. It’s a maintenance tool, not a transformation.
The basic chemistry is straightforward. Your outer layer of skin cells is held together by a kind of “glue” made of lipids and proteins. The acids in these peels work by breaking down that adhesive bond.
Imagine the dead skin cells on your surface are like old, dirty tiles on a floor. A gentle acid peel is like applying a solution that loosens the grout. This allows you to lift those tiles away easily, revealing the cleaner surface underneath without damaging the floor itself. Different acids offer exfoliating properties tailored to various skin types, so you can choose a formula that fits yours. Understanding your skin type helps you pick the right strength and avoid over-exfoliation.
At-home formulas are designed to work strictly on the epidermis, your skin’s outermost layer. Professional peels use higher acid concentrations and lower pH levels to create a controlled injury, penetrating into the deeper dermal layers to trigger more significant collagen remodeling. The at-home version is for surface-level renewal.
A Simple Guide to the Acids in Your At-Home Peel
Not all acids are created equal. Their molecular size, solubility, and strength dictate what they can do for your skin. Here’s your practical “Molecule Spec Sheet” to cut through the confusion.
| Acid Name | pH Range | Typical At-Home Concentration | Solubility | Key Safety Note |
|---|---|---|---|---|
| Glycolic | 3.5 – 4.0 | 5% – 10% | Water | Can be irritating for very sensitive skin. Always sunscreen after. |
| Lactic | 3.5 – 4.0 | 5% – 10% | Water | Gentler than glycolic. A good “first acid” for many. |
| Salicylic | 3.0 – 4.0 | 0.5% – 2% | Oil | Best for oily, acne-prone skin. Do not use if allergic to aspirin. |
| Mandelic | 3.0 – 4.0 | 5% – 10% | Water | Larger molecule, gentler penetration. Excellent for sensitive and darker skin tones. |
Now, let’s translate that table into skin goals.
Glycolic acid is a small molecule that’s superb for tackling surface texture, fine lines, and dullness. My client Lina often uses a low-concentration glycolic serum on her T-zone to keep pores clear. For many, proper glycolic acid application on the face is key to balanced results. When done gently and as part of a regular routine, it can boost radiance without over-exfoliation.
Lactic acid is a slightly larger molecule that exfoliates while helping to bind moisture, making it a star for dry or dehydrated skin. It’s a frequent recommendation for someone like Noah, who wants glow without aggravating dryness.
Salicylic acid is oil-soluble, meaning it can dive into pores to dissolve the mix of oil and dead skin that leads to clogs and blackheads. This is a go-to for my client Maya’s acne-prone routine, although some users still wonder if it can cause acne.
Mandelic acid, with its large molecular structure, delivers a slow, even exfoliation that’s less likely to cause irritation, making it a safe bet for reactive skin.
You should never attempt to use high-concentration Trichloroacetic Acid (TCA), phenol, or deep peeling formulas at home. These are medical-grade procedures that require a professional’s assessment, precise application, and medical monitoring due to their depth and associated risks like scarring or pigment changes.
What Can You Realistically Expect an At-Home Peel to Fix?

Think of at-home peels as skilled refinishers, not demolition crews. Their job is to polish the surface, not rebuild the foundation. The key to success is matching the acid to your specific concern.
For clogged pores and oily skin, a BHA (beta hydroxy acid, like salicylic acid) is your best friend. It’s oil-soluble, meaning it can dive into pores to dissolve the gunk that leads to blackheads and congestion. My client Maya, with her oily, acne-prone skin, sees her clearest complexion when she uses a gentle BHA peel once a week to keep pores in check.
If your concern is a rough, dull, or flaky texture, gentle AHAs (alpha hydroxy acids, like glycolic or lactic acid) are the answer. They work on the surface to dissolve the “glue” holding dead skin cells together. For someone like Noah, who has dry, reactive skin, a low concentration lactic acid peel can gently lift that dry top layer without provoking his sensitivity, revealing smoother skin beneath.
For those with sensitive skin or concerns like post-inflammatory hyperpigmentation (PIH), mandelic acid is a star. It’s a larger AHA molecule, so it penetrates more slowly and gently. Some people explore mandelic acid combinations tailored for sensitive skin. When paired with soothing actives, it can brighten spots without triggering redness. Lina, with her combination, sensitive skin, finds mandelic acid effectively brightens her darker spots without upsetting her cheeks, which are prone to redness.
You must set clear expectations. A good at-home peel will refine texture, brighten dullness, smooth fine lines, and improve mild discoloration. It will not erase deep wrinkles, severe acne scars, or substantially lift sagging skin. Those concerns require the deeper, controlled injury of a professional treatment.
If you are managing melasma or stubborn PIH, proceed with extreme caution. While certain acids can help, they also make your skin more photosensitive. Using an at-home peel for pigmentation without militant, daily sun protection (SPF 50+, reapplied) is like taking one step forward and two steps back into the sun. Often, professional guidance is needed for these complex conditions.
Finally, remember this is a marathon, not a sprint. You won’t see dramatic results after one use. True improvement comes from cumulative, consistent use over weeks, always respecting your skin’s need for recovery between treatments.
The Safety Checklist: Contraindications and When to Absolutely Avoid
Safety isn’t just the first step, it’s every step. Applying a chemical exfoliant to compromised skin is asking for trouble. Expired or weakened products can lose potency and irritate the skin. Check expiration dates and proper storage to keep potency. Here is your non-negotiable checklist.
Absolute “Stop, Do Not Pass Go” Contraindications:
- Any active rash, infection, sunburn, or windburn.
- Broken skin, open wounds, or fresh abrasions.
- You have recently waxed, lasered, or had a professional peel in the treatment area.
- You are using a prescription retinoid (like tretinoin) and have not gotten explicit approval from your prescribing doctor to add a peel.
Strong Cautions – Tread Very Carefully, If At All:
- You have a history of eczema or psoriasis that is currently flaring or even feels imminent.
- You are experiencing an active rosacea flare-up with redness and pustules.
- You have a naturally darker skin tone (Fitzpatrick IV-VI), which carries a higher inherent risk of post-inflammatory hyperpigmentation from any skin injury.
- You are pregnant, breastfeeding, or trying to conceive. Consult your obstetrician first.
Before you even consider a peel, perform this simple “Barrier Health Test.” Apply your gentlest, most soothing moisturizer to clean, dry skin. If you feel any stinging, tingling, or unusual warmth, your skin barrier is compromised. If your skin stings with a basic moisturizer, it is absolutely not ready for an acid peel. Focus on barrier repair first.
If you have a complex skin history, like persistent cystic acne, a diagnosed autoimmune condition affecting the skin, or are unsure about interactions with medications, your safest first step is a professional opinion. Advising a quick consultation with a dermatologist or licensed esthetician is my strongest recommendation for anyone with a complex medical skin history before starting at-home peels. It’s the smartest investment in your skin’s health.
The Step-by-Step Guide to Using an At-Home Peel Without Drama

Think of this as your pre-flight checklist. Skipping steps is how you end up with redness, irritation, or a reaction that sidelines your skin for weeks.
The most critical step happens 48 hours before the peel ever touches your face.
- Conduct a Patch Test. This is non-negotiable. Apply a small amount of the peel solution behind your ear or on the inside of your arm. Leave it for the full recommended time, then rinse. Watch that spot for 24-48 hours. If you see significant redness, itching, or swelling, this formula isn’t for you. My client Noah, with his reactive skin, swears by this. It saved him from a full-face reaction to a mandelic acid peel he thought would be “gentle.”
- Prep Your Canvas. On the day, cleanse your face with a gentle, non-exfoliating wash. We’re talking a basic, creamy or gel formula-nothing with beads, scrubs, or other acids. Your skin must be completely dry before application. Water on the skin can alter the pH of the peel and cause it to penetrate unevenly or irritate more.
- Apply with Care. Use a clean fingertip, a cotton pad, or the tool provided. Avoid the delicate skin around your eyes, the corners of your nose, and your lips. Set a timer for the exact minute listed in the instructions, not a second more. The “tingle” is normal; a burning pain is not. If it truly stings, rinse off immediately.
- Neutralize or Rinse. This is where people get confused. Some peels are “self-neutralizing,” meaning the acid becomes inactive after a certain time on the skin. You just gently rinse with cool water. Others require you to rinse or use a neutralizing solution at the marked time. Always follow your specific product’s directions to the letter. When in doubt, rinsing is the safer move.
- Recover Intelligently. Pat your skin dry-don’t rub. Follow with a simple, soothing moisturizer. The next day, your skin is more vulnerable. Applying a broad-spectrum sunscreen is not optional; it’s your number one priority. Avoid other actives like retinols or vitamin C for at least 3-5 days. Treat your skin like you would after a mild sunburn: hydrate, protect, and be gentle.
Professional vs. At-Home: A Frank Comparison of Results and Risk
Choosing between an at-home peel and a professional treatment isn’t just about cost-it’s about matching the tool to the job.
Depth of Treatment: At-home peels are designed to work on the very surface of your skin, the stratum corneum. They’re excellent for lifting away dullness, smoothing minor texture, and helping with superficial discoloration. A professional peel, administered by an esthetician or dermatologist, can reach deeper into the epidermis or even the dermis. This allows them to tackle deeper wrinkles, significant sun damage, and more stubborn acne scars that surface-level peels can’t touch.
Strength and Formulation: Over-the-counter peels are bound by concentration and pH limits to ensure relative safety for untrained users. Professional peels use clinic-grade formulas with higher acid concentrations and lower pH levels, making them significantly more potent. It’s the difference between dusting a shelf with a cloth and sanding it down with fine-grit paper. From a barrier-health perspective, pH and formulation choices influence the skin’s acid mantle and its ability to recover after exfoliation. Thus, pH-focused skincare formulations play a key role in barrier health.
Cost Over Time: A single professional peel has a higher upfront cost, often between $150-$400. A bottle of at-home peel serum might cost $30-$80. However, for sustained results, you might buy several bottles a year. For managing a chronic issue like melasma, the cumulative cost of at-home products that only scratch the surface can sometimes surpass the investment in fewer, more effective professional treatments.
Supervision and Safety: This is the biggest differentiator. In your bathroom, you’re relying on a mirror and your own judgment. In a clinic, a trained professional assesses your skin type, condition, and tolerance in real time. They can adjust the peel’s timing, use occlusive barriers to protect sensitive areas, and provide immediate care if you react. They also have the medical history to know if a peel is safe for you.
So, when do you choose which path? For my client Maya, who wants to manage monthly oil and congestion between facials, a weekly salicylic acid at-home peel is perfect. For someone like Lina, curious about tackling early sun spots, starting with a gentle at-home lactic acid peel is a smart first step. But for significant concerns-deep acne scarring, pronounced wrinkles, or patches of stubborn discoloration-investing in a professional consultation is the safer and more effective starting point. They can create a plan that might even include safe at-home maintenance between office visits.
Acid Etiquette: The Before, During, and After Care That Makes It Work
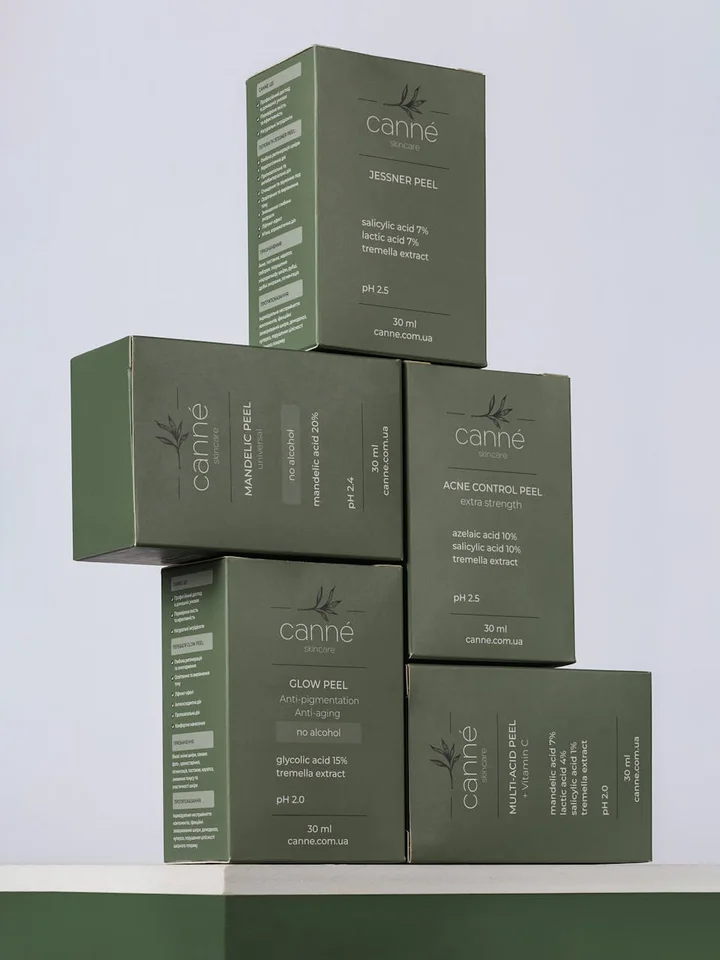
Think of an acid peel like a workout for your skin. You wouldn’t run a marathon without training or cooling down afterward. The same logic applies here. Skipping the prep and recovery is the fastest way to turn a glow-getting treatment into a skin-scrambling setback.
The Pre-Peel Prep Week: Calm Before the Storm
For the full week before your planned peel day, your routine has one job: be boring and gentle. This is about creating a stable, hydrated base so your skin can handle the treatment without freaking out.
- Pause all other actives. This means stop using retinol, retinal, strong vitamin C serums, and any other exfoliating acids (like salicylic or glycolic toners). These ingredients make your skin more receptive, and using them right up to a peel is like overtraining before a big race.
- Focus on barrier-supporting hydration. Swap to a simple routine of a gentle cleanser, a hydrating serum with ingredients like hyaluronic acid or glycerin, and a comforting moisturizer. Your skin barrier should feel plump and calm.
This prep week tells your skin, “We’re safe and strong,” which minimizes irritation and maximizes your results.
Peel Day: The Main Event, Simplified
When the day arrives, keep it minimal. Do this in the evening, giving your skin the whole night to begin its recovery undisturbed.
- Cleanse: Wash your face with your gentle, non-exfoliating cleanser. Pat your skin completely dry. Some experts even recommend wiping the area with a little acetone (yes, like nail polish remover, but the pure kind) on a cotton pad to degrease the skin for even acid penetration. I do this for clients with very oily skin, like Maya, but skip it if your skin is dry or sensitive like Noah’s.
- Peel: Apply the acid solution exactly as the product instructions state. Use a timer! Do not guess. A gentle tingling or warmth is normal; a sharp, burning pain is not.
- Soothe: Once time is up, rinse thoroughly with cool water. Do not use a cleanser. Pat dry and apply a generous layer of a basic, soothing moisturizer or a dedicated post-peel cream. That’s it. No serums, no oils, no other products.
The Recovery Week: Baby Your Skin
This is the most critical phase. Your skin is actively shedding old layers and rebuilding new ones. It’s vulnerable.
- Cleanser: Use only your gentlest, cream-based cleanser.
- Moisturizer: Switch to a richer, more emollient formula. Think of it as a protective blanket for your new skin. Ingredients like ceramides, squalane, and panthenol are perfect.
- Sunscreen: Non-negotiable mineral sunscreen, every single morning. Your new skin is ultra-sensitive to the sun. Zinc oxide and titanium dioxide provide a physical block and are less likely to irritate than chemical filters right now.
- Absolute No’s: No exfoliation of any kind. No scrubs, acids, or exfoliating brushes. Avoid hot water on your face. Do not pick, scratch, or pull at any flaking skin.
A Cautionary Tale: When Etiquette is Skipped
I have a client, Noah, who has dry, reactive skin. He was thrilled with the initial glow from a mild at-home lactic acid peel. Two days later, feeling no irritation, he decided to “boost” the results by using his prescription retinol cream. The next morning, his skin was tight, red, angry, and felt like sandpaper. He learned the hard way that a lack of immediate stinging does not mean your barrier is ready for more. It took us two weeks of the most basic barrier repair routine to recover from that misstep. Patience is not just a virtue in skincare; it’s a requirement.
Red Flags: When to Stop and Call a Professional
Listen to your skin. Normal peeling or slight dryness is expected. These signs are not:
- Prolonged intense burning or pain that continues long after rinsing off the peel.
- Swelling, especially around the eyes.
- Oozing, crusting, or signs of infection (yellow fluid, increased heat).
- Discoloration that isn’t normal flaking-think deep redness, purple tones, or white patches that don’t blend with your skin tone.
If you see any of these signs, stop using all actives, revert to a gentle routine, and contact a dermatologist or your esthetician. It’s better to get a professional opinion than to hope a serious reaction will just go away on its own.
Your At-Home Peel Questions, Answered
How effective are at-home acid peels compared to professional treatments?
At-home peels are excellent for surface-level maintenance like brightening dullness and smoothing mild texture, acting as a regular polish. Professional treatments use higher-strength formulas to create deeper, controlled corrections for concerns like significant sun damage or deep wrinkles, which home products cannot safely achieve.
What are the biggest safety risks if I use an at-home peel incorrectly?
The primary risks are chemical burns, severe irritation, and post-inflammatory hyperpigmentation, especially if you leave the peel on too long or use it on compromised skin. Always follow the timed instructions exactly and perform a patch test to assess your skin’s tolerance before any full-face application.
How do I know if my skin is having a bad reaction?
Normal includes mild tingling or slight dryness; a bad reaction involves persistent burning pain, swelling, oozing, or discolored patches. If you experience these red flags, stop all actives, switch to a gentle recovery routine, and consult a dermatologist or esthetician immediately.
Your Skin, Your Smart Choices
At-home acid peels can be a fantastic tool for maintaining your skin’s clarity and glow, but they are not a replacement for a professional treatment. The most important rule is to start low, go slow, and always, always prioritize your skin barrier’s health over chasing instant results. Think of them as skilled assistants, not the lead surgeon. If you’re curious about glycolic acid daily professional peels, a clinician can tailor a safe plan for your skin. They can help you weigh how these peels fit with your routine while protecting your skin barrier.
- Treat your at-home peel like a prescription, following frequency and timing guidelines exactly.
- If your skin is sensitive, reactive, or you’re dealing with a specific condition like rosacea, start with a professional consultation first.
- Your post-peel routine-gentle cleansing, serious hydration, and relentless sunscreen-is what locks in the benefits and keeps your skin safe.
- When in doubt, choose the milder formula; consistency with a gentle product beats the damage from one that’s too strong.
I’m here to help you navigate these choices. For more guidance tailored to your unique skin story, explore other articles right here on the blog. If you have a question about your routine, my virtual door is always open-send your questions through our contact page. Your skin’s long-term health is the only result that truly matters.
Sources and Additional Information
- How to Use Chemical Peels at Home, According to Experts – The New York Times
- The Beginner’s Guide to At-Home Chemical Peels
- How to Do an At-Home Chemical Peel Safely | Allure
- Safe Neutralization of Acid Peels at Home: A Step-by-Step Guide | Authentic K-Beauty | Fast Worldwide Shipping
- Can I do a chemical peel at home safely?
Lucy is an expert author and blogger when it comes to skin care and body care. She has first hand expertise acting as skin care consultant for over 5+ years helping her clients achieve smooth blemish free skin with natural and working remedies. She also has been an avid experimenter and tried out all the natural and artificial remedies and treatments so you can learn from her first hand experience. Additionally, she has traveled to many countries around the world and incorporated the skin care routines she has learnt into this blog. So, wait no more, reach out to Lucy if you have any specific needs and follow her blog, LuciDerma for expert skin care advice.