
Layer Your Botanical Toners Correctly: A Clear Guide to pH, Order, and Results
Stacking multiple toners feels exciting but confusing, doesn’t it? I guide clients through this every week, and with a few chemistry principles, you can do it too.
This article will walk you through the simple logic so you can build a routine that works. Here’s exactly what you’ll be able to do:
- Apply toners in the right order based on their pH, so each ingredient can do its job.
- Understand how lightweight textures and botanical extracts penetrate your skin layers.
- Combine toners confidently to target concerns without wasting product or causing irritation.
You’re about to make your toner collection work smarter for your skin.
Why Toners with Multiple Botanicals Need a Smart Strategy
A toner packed with five or more botanical extracts is not just one simple product. It is a complex chemical cocktail where each ingredient has a job to do, especially in preserving natural botanical extracts.
Think of it like mixing paints. Using a single color is predictable and straightforward. But when you blend many colors together, you need a specific order to create the desired hue, not a muddy mess. Layering these multi-ingredient toners requires the same thoughtful strategy.
These toners are typically formulated to achieve a few key goals for your skin:
- Hydrating by pulling moisture into the skin’s surface.
- Soothing sensitivity and calming visible redness.
- Offering antioxidant protection from daily environmental stressors.
If you layer them without a plan, you risk neutralizing their benefits, causing them to pill on your skin, or triggering irritation. I see this often with clients like Lina, who has combination skin; using toners in the wrong order can leave her T-zone oily and her cheeks feeling tight.
The pH Factor: The Non-Negotiable Rule for Layering
pH is simply a measure of how acidic or alkaline a substance is. Picture a spectrum from lemon juice (very acidic) to dissolved baking soda (alkaline).
Your skin’s surface has a natural, slightly acidic pH, usually between 4.5 and 5.5. This acidity is a core part of your skin’s barrier, helping to keep moisture in and potential irritants out.
Your golden rule for layering is to apply products from the lowest pH, or most acidic, to the highest pH. This sequence respects your skin’s natural environment and helps each toner absorb effectively, especially when layering hyaluronic acid and retinol.
If a product’s pH is not listed on the bottle, look for clues in the description. Words like “AHA,” “BHA,” or “exfoliating” often signal a lower, more acidic pH. Terms like “gentle,” “soothing,” or “pH-balanced” usually indicate a formula closer to your skin’s natural pH.
The Molecule Spec Sheet: Key Botanical Players
Use this guide to understand how common botanical extracts behave. This helps you place them correctly in your routine.
| Ingredient | Typical pH Range | Key Solubility | Layering Safety Note |
|---|---|---|---|
| Witch Hazel Extract | 4.0 – 6.0 | Water-Soluble | Can be drying; layer over hydrating toner if skin is sensitive. |
| Green Tea Extract | 5.0 – 7.0 | Water-Soluble | Stable with most ingredients; a safe “middle” layer. |
| Liquorice Root Extract | 5.5 – 6.5 | Water-Soluble | Gentle brightener; can follow acid-based toners. |
| Centella Asiatica | 5.0 – 6.5 | Water-Soluble | Soothing; ideal final toner step before moisturizer for barrier support. |
Since all these extracts are water-soluble, they generally layer well together. The main consideration is pH order and how your individual skin reacts. For my client Noah, who has dry, reactive skin, I always recommend patch testing a new toner on his jawline for a few days before adding it to a layered routine.
The Step-by-Step Order for Layering Botanical Toners
Think of your toner lineup like a skilled team, where each player has a specific position. You wouldn’t put your goalie in first. The right order lets each formula do its job without getting in the way of the next.
Your skin goal decides who gets the first spot on the team. If you’re targeting clogged pores or acne (like Maya often does), you lead with an exfoliating toner. For dehydration, a hydrating toner goes first. Calming redness? A soothing toner takes the lead.
A Universal Layering Blueprint
This order respects pH levels and texture, working for most goals.
- Cleanse. Start with a clean, damp canvas.
- Exfoliating or Active Toner (Lowest pH). Formulas with AHAs, BHAs, or PHA work best on bare skin at their effective, lower pH. This is your treatment step.
- Hydrating Botanical Toner. Think of toners with humectants like hyaluronic acid or glycerin. They draw moisture into skin primed by the first layer.
- Soothing or Nutrient-Rich Final Toner. Toners with centella, oats, or nourishing oils seal in previous layers and calm the skin.
Your Top Layering Questions, Answered
“How long should I wait between layers?” You don’t need a full timer. Just wait until your skin feels slightly damp, not wet or dry-about 30 to 60 seconds. This lets each layer absorb properly without diluting the next, especially when you layer hydrating serums and moisturizers.
“Hands or cotton pad?” I recommend your clean hands for hydrating and soothing toners-you waste less product. Use a soft cotton pad for exfoliating toners if you want gentle, even removal of any last traces of cleanser or debris.
Formulation Pro-Tip: The Texture Test
Your fingers are smart tools. After pH, texture is your best guide for order.
Water-thin, runny textures always go first. They’re designed to penetrate quickly. A slightly viscous, slippery texture (often from hyaluronic acid) comes next-it forms a hydrating layer. Save any toner with a richer, slightly emollient feel (sometimes from botanical oils) for last.
Never mix toners together in your palm before applying. This can neutralize their carefully balanced pH and cause the textures to conflict, making them less effective.
Solving Common Layering Problems (Before They Start)
Layering should feel like adding silk, not sandpaper. If it doesn’t, here’s how to troubleshoot.
Problem: “My toners are pilling!”
This is a texture clash, often from conflicting polymers (thickening agents). Try patting products in gently instead of rubbing, or change the order you apply them. A water-thin toner might need to go before a gel-textured one.
Problem: “My skin feels tight and irritated.”
This is a red flag. Your skin’s pH might be disrupted, or you could be over-exfoliating. Take a toner detox for one week: use only a single, soothing, pH-balanced toner. This lets your barrier recover. You can slowly rebuild from there.
Your Layering Checklist
Signs you’re layering well: Skin looks plump, feels comfortable, absorbs products without residue, and shows steady improvement in your target concern.
Signs you need to stop or simplify: Persistent redness, stinging, tightness, flaking, or immediate pilling that doesn’t resolve with patting.
For Sensitive Skin (A Note for Noah)
If you have reactive skin like Noah, patience is your most important ingredient. Introduce one new botanical toner at a time, waiting at least a week before adding another. This helps you pinpoint any irritants.
Prioritize toners with barrier-supporting extracts like centella asiatica or colloidal oats. Apply these as your final, protective layer. Most importantly, avoid layering multiple toners with astringent extracts (like witch hazel or tea tree) back-to-back, as this can be overly drying and provocative for sensitive skin.
Building Your Personal Botanical Layering Routine
Think of your toner lineup like a custom tea blend. You wouldn’t just toss every herb in your cabinet into one cup. You select for purpose. Start by grabbing your current toners and reading the ingredient lists, not just the fancy names on the front.
Look for the key botanical extracts and learn their primary jobs: Is it Green Tea for calming antioxidants, Willow Bark for gentle exfoliation, or Centella Asiatica for soothing repair? Write down one or two main actions for each product. This turns your shelf from a collection of “nice-smelling liquids” into a targeted toolkit.
Morning Shield vs. Evening Repair
Your skin’s needs shift with the time of day. This is where strategic layering shines.
- AM Routine Goal: Antioxidant Protection. During the day, your skin fights pollution and UV-induced free radicals. A toner with Green Tea, Vitamin C derivatives (like Sodium Ascorbyl Phosphate), or Resveratrol acts as a protective base layer before your sunscreen.
- PM Routine Goal: Recovery and Soothing. Nighttime is for repair. Toners with Liquorice Root (to fade dark spots), Centella Asiatica (to calm redness), or Ceramides (to support your skin barrier) prepare your face to best absorb your night treatments.
My client Noah, with his dry, reactive skin, uses only a single, calming Centella toner in the morning but adds a liquorice-infused layer at night to gently address discoloration while he sleeps.
Can I Layer a Toner with a Similar Serum?
This is a common question. The short answer is you usually don’t need to. If your goal is to treat redness with Centella, and you own both a Centella toner and a Centella serum, layering them is often redundant and can waste product.
Choose the single product that has your target botanical extract listed higher in its ingredient list, as this generally indicates a higher concentration. Use that one. More layers of the same ingredient rarely means more benefit, but it can increase the chance of irritation for sensitive skin. For consistency and reliable potency, look for standardized novel botanical extracts that maintain uniform potency across batches. This helps you compare products more reliably and supports smoother decision-making.
A Sample Routine for Combination, Blemish-Prone Skin (For Lina)
Let’s take my client Lina. Her T-zone gets oily and clogged, but her cheeks are sensitive. A multi-toner approach lets her address these zones differently.
- Step 1 (Targeted Treatment): Apply a gentle, low-pH BHA (salicylic acid) toner only on the T-zone. This helps clear pores without over-drying her cheeks. Wait 60 seconds for it to work.
- Step 2 (Base Hydration): Pat a hydrating toner with Hyaluronic Acid and Chamomile extract all over her face. This delivers a blanket of moisture and soothes the skin.
- Step 3 (Targeted Soothing): Follow with a toner containing Niacinamide and Liquorice Root, focusing on her cheeks and any red or post-breakout marks. This combo helps strengthen her barrier and reduce redness.
The most crucial note here is to listen to your skin like Lina does; if her skin feels sensitive or tight, she skips Step 1 entirely for a few days. The routine serves you, not the other way around.
When to Simplify: The Power of a Single, Well-Formulated Toner
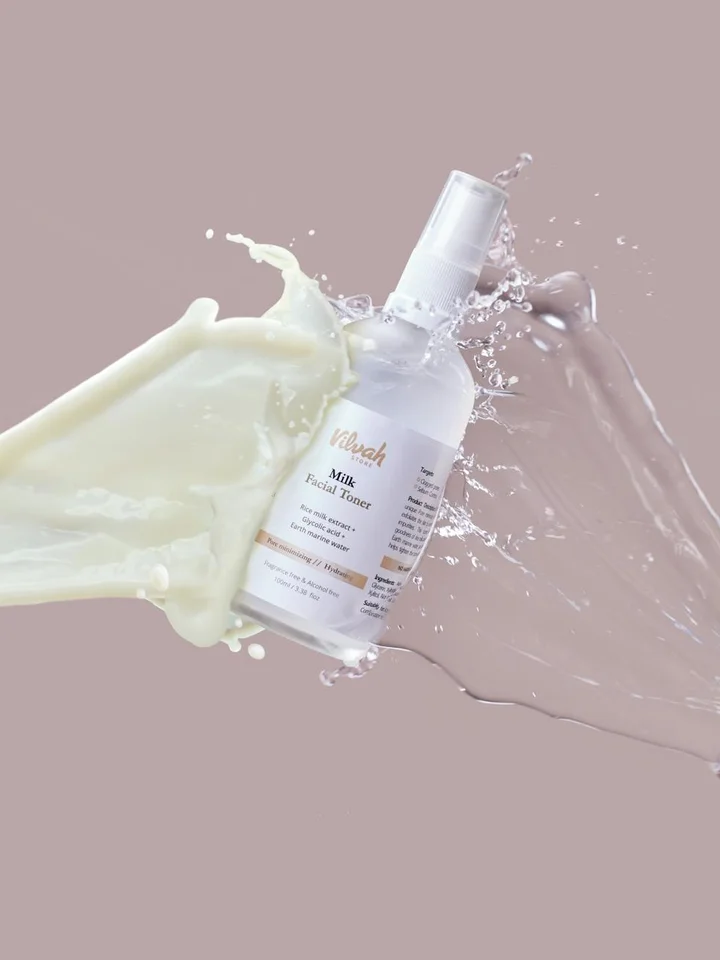
Layering can be fun, but it’s not a requirement for great skin. Sometimes, the most elegant solution is one brilliantly balanced bottle.
More layers isn’t always better. A single toner crafted with a synergistic blend of 2-3 key extracts can be more stable, effective, and less confusing for your skin barrier. A formula where Green Tea and Hyaluronic Acid work together is often smarter than applying two separate toners that might not play well together pH-wise.
Learn to read the ingredient list like a pro. Ingredients are listed in order of concentration. The first five ingredients hold the most weight. Ask yourself: Are the botanical extracts I want listed early, or are they dangling at the very end after the preservatives? If it’s the latter, you’re probably not getting much of that celebrated plant power.
Remember, skincare is deeply personal. Maya with her oily skin might thrive with two light layers, while Noah finds his perfect match in one fragrance-free hydrating toner. The goal is a calm, balanced complexion, not a complex routine for its own sake.
Your skin’s comfort is the ultimate sign of correct layering. Any tightness, persistent redness, or peeling is your skin asking you to pause and reassess. To guard against comedogenic reactions, run a quick patch test on a small area before applying products to your face. This simple step can help you spot sensitivities early. Simplify, patch test, and always return to the basics of gentle cleansing, targeted treatment, and diligent moisturizing and sun protection.
Your Smart Layering Questions, Answered
How should I introduce a new botanical toner into an existing layering routine?
Always patch test the new toner alone for several days before incorporating it into your sequence. Introduce it as a single layer for a full week to see how your skin responds before building more complex combinations.
Can layering multiple toners replace a treatment serum?
It can, if your toners collectively deliver the key active ingredients your skin needs. However, a dedicated serum often contains higher, more stabilized concentrations of a single active, which can be more efficient for targeting a specific, stubborn concern.
What’s the biggest mistake people make when starting to layer?
Overcomplication. Starting with more than two toners often overwhelms the skin’s barrier. The goal is strategic support, not quantity-begin with two complementary formulas and only add a third if your skin clearly benefits from it.
Final Thoughts on Layering with Intelligence
Layering toners isn’t about piling on products. It’s a strategy to make each botanical extract work harder for your skin. Think of your routine as a relay race, where each step passes the baton to the next for the best possible result.
- Always start with the toner that has the lowest pH or the most active ingredient you want to penetrate deepest.
- Wait about 60 seconds between layers to let each product settle.
- Don’t layer ingredients that conflict, like a low-pH exfoliant immediately before a high-pH soothing milk.
- When in doubt, patch test a new layering combination on your jawline for a few nights.
We’re here to help you navigate your skin journey. This blog is built on real questions from people like you, Maya, and Noah. If you have a question about your toner lineup, send it our way. We’re dedicated to providing clear, sustainable guidance you can trust.
Citations and Authoritative Sources
- I tried the Korean ‘7 Skin Method’ and it rescued my dehydrated skin – Glow Recipe
- This Korean Toner Trick Will Give You the Glowing Skin of Your Dreams
- Layering Skincare Products with Toners: How to Maximize Efficacy – QRxLabs
- Korean 7-Layer Toner Method: Guide to Hydrated Skin | Beauté Library
- r/AsianBeauty on Reddit: Which way do you layer toners? (When it comes to HA)
- r/30PlusSkinCare on Reddit: The 7 layers toner method
- Layering Guide | The Ordinary
- The Correct Skin Care Order for Layering Products | Vogue
- Skincare Layering: Your Complete Guide to Optimize Results
- 7 Skin Method – Korean skincare & cosmetics | Amsterdam, Rotterdam | Netherlands | Europe
Lucy Zimmerman
Lucy is an expert author and blogger when it comes to skin care and body care. She has first hand expertise acting as skin care consultant for over 5+ years helping her clients achieve smooth blemish free skin with natural and working remedies. She also has been an avid experimenter and tried out all the natural and artificial remedies and treatments so you can learn from her first hand experience. Additionally, she has traveled to many countries around the world and incorporated the skin care routines she has learnt into this blog. So, wait no more, reach out to Lucy if you have any specific needs and follow her blog, LuciDerma for expert skin care advice.