
Patch Test Like a Pro: Avoid Comedogenic Breakouts for Good
New skincare or makeup shouldn’t mean new breakouts. As an esthetician, I teach clients like Noah how to test products safely to prevent those frustrating, pore-clogging surprises.
- You’ll know the exact spot to test for comedogenic reactions, saving your entire face from potential flare-ups.
- You’ll understand why this step is critical for every skin type, especially if you’re acne-prone or sensitive.
- You’ll master a clear, foolproof routine to introduce any new product with confidence.
With this guide, you’re building a smarter, safer way to care for your skin.
Why a Comedogenic Patch Test is Your Skin’s Best Friend
A “comedogenic reaction” is a formal way of saying a product is clogging your pores. It doesn’t usually mean a dramatic, itchy rash. Instead, it shows up as new blackheads or those small, gritty, flesh-colored bumps that seem to appear out of nowhere.
The entire goal is to catch a pore-clogging product on a small, safe patch of skin before you smear it all over your face and trigger a breakout. I think of my client Maya. She was excited about a rich new moisturizer and applied it to her entire face. Within a week, her jawline was dotted with stubborn little bumps that took a month to clear. A simple test could have saved her that frustration. When using any skincare or makeup product, it’s crucial to perform a patch test first.
Patch testing is like trying a single bite of a new dish before you commit to the whole plate. It’s a small investment of time for a huge payoff in skin stability.
What Exactly Are We Testing For?
We are specifically watching for clogged pores, known as comedones. This is different from testing for an allergic reaction, which typically involves redness, swelling, or intense itching. A comedogenic reaction is sneakier and slower, especially when it comes to Sodium ingredients that are comedogenic and pore-clogging.
Imagine your pore is like a narrow tube. Some ingredients are thicker or stickier, and for certain skin types, they can act like glue inside that tube, trapping oil and dead skin cells. This process creates a plug that becomes a blackhead or a closed bump, and it can take several days to become visible. That’s why our test period is longer than you might think.
Your Step-by-Step Guide to Patch Testing at Home
You only need three things: your usual gentle cleanser, a cotton swab, and the new product you want to test. Keep the rest of your routine simple and consistent during this period. Avoid introducing any other new serums, creams, or treatments so you know exactly what’s causing any reaction.
Picking the Perfect Test Spot
The best places are the side of your neck or the skin behind your ear. These areas are sensitive and have a density of pores similar to your face, making them reliable predictors. Avoid testing on skin that’s already broken, irritated, or sunburned, as you won’t be able to read the results accurately.
The 48-Hour Test Protocol
- In the evening, cleanse the test area (like behind your ear) with your regular gentle cleanser and pat it dry.
- Apply a pea-sized amount of the new product directly to the skin using a clean cotton swab.
- Let it absorb and do not wash it off. Leave it on for a full 48 hours.
You must leave the product on for the full two days to properly mimic how skincare works when incorporated into your daily routine. Avoid scrubbing the area in the shower or applying any other products over it, especially when combining with other products like adapalene in your routine. Just let it be.
After 48 hours, examine the spot in good light. Look closely for new, small bumps, blackheads, or unusual texture. If the spot is clear, the product is likely safe for you to use on your face. If you see new clogged pores, you’ve successfully identified a product your skin doesn’t agree with, such as one containing comedogenic ingredients like caprylic triglyceride.
Testing Makeup vs. Skincare: A Slight Twist
Makeup, like foundation or primer, presents a different challenge because we wear it for many hours at a time. A 48-hour spot test behind your ear is still your first essential step to check for immediate clogging ingredients.
If that test is clear, I suggest a “mini wear test” on a small section of your jawline. Apply the makeup as you normally would and wear it for a full 6 to 8 hours, then remove it gently. Monitor that specific patch of jawline for the next couple of days for any new bumps. This two-phase approach helps account for the prolonged wear and friction that can sometimes lead to clogged pores with makeup formulas.
How to Read Your Skin’s Reaction: The Good, The Bad, The Bumpy
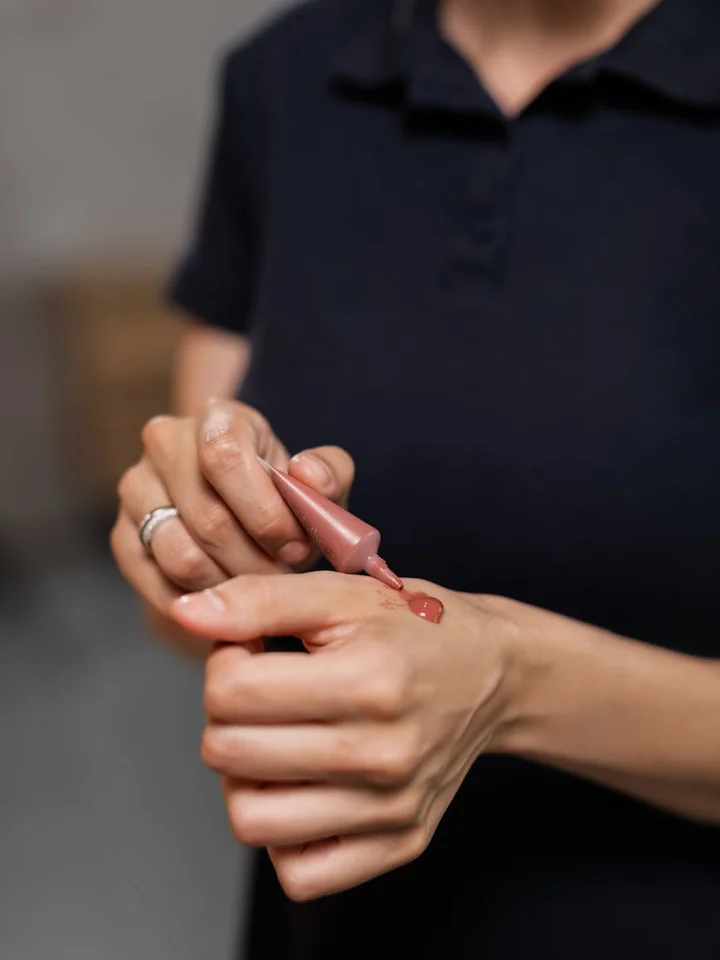
After 24 hours, and again at the 48-hour mark, take a close look at your patch test area. Do this in consistent, good lighting-natural light by a window is perfect.
A negative result, which in patch testing means a good result, is when the skin looks and feels exactly the same as the surrounding area. There’s no change in texture, color, or sensation. This is your green light to proceed with more confidence.
Signs of a Positive (Pore-Clogging) Reaction
Your skin is telling you this formula might be too rich or waxy for your pores. Look for these specific signs:
- New, tiny flesh-colored bumps (these are closed comedones).
- The appearance of blackheads in the spot.
- A new feeling of roughness or sandpaper-like texture where the product was applied.
It’s important to separate this from an allergic reaction. An allergy typically involves redness, hives, swelling, burning, or intense itching soon after application. A comedogenic reaction is quieter; it’s about clogging, not fighting.
For some skin types, the signal is subtle. My client Noah, with his dry, reactive skin, once reacted to a rich cream with just one deep, stubborn clogged pore right on his test spot. That was enough for him to know.
When Reactions Play Hide and Seek
Comedogenic reactions can be sneaky. Sometimes, one application isn’t enough to cause a visible clog. It can take a few days of repeated use for the buildup inside the pore to show itself.
This is why I recommend a two-phase test. If your 48-hour behind-the-ear or jawline test is perfectly clear, don’t declare total victory yet. Move to phase two: use the product on a small, discreet area of your face-like the center of your cheek-once daily for one full week.
Treating this one-week facial test as your final checkpoint catches those slower-forming clogs before you commit your whole complexion.
What to Do If Your Patch Test Goes Wrong
First, don’t panic. This is exactly why we test. Your immediate action plan is simple.
Stop using the product immediately. Full stop. Then, gently cleanse the area with a mild, non-stripping cleanser. Follow with a basic, non-comedogenic moisturizer to support your skin barrier as it clears out the clog.
Resist the urge to attack the new bumps. Do not try to aggressively scrub or exfoliate them away. This can cause more inflammation and potentially push the clog deeper or lead to scarring.
Think of it like a traffic jam in a pore; you need to calmly redirect traffic, not angrily honk and make it worse. Gentle care allows your skin to resolve the clog on its own timeline.
When to See a Dermatologist
Most minor clogging reactions will calm down with a return to your simple, trusted routine. But there are times to call in a professional.
You should consider booking an appointment if:
- The reaction develops into deep, painful cysts.
- You experience widespread redness, swelling, or irritation beyond the test area.
- You have a pre-existing condition like rosacea or eczema that flares severely from the product.
A board-certified dermatologist can accurately diagnose what’s happening and may perform more comprehensive patch testing if you have stubborn, recurring sensitivities. They are your best resource for navigating complex reactions and building a safe, effective routine.
Ingredients That Deserve Extra Attention
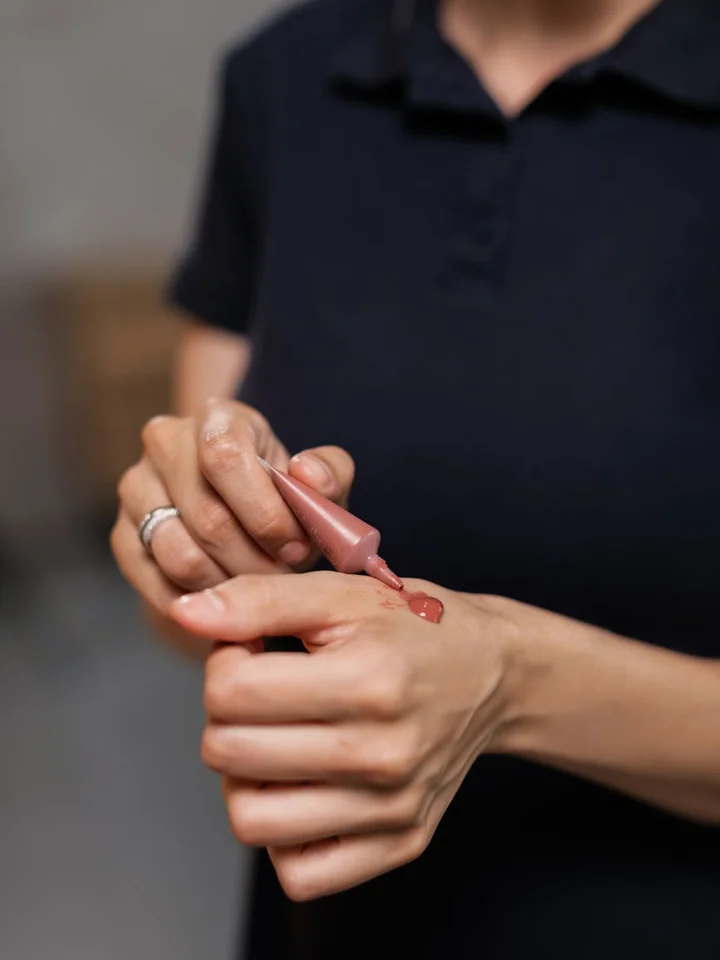
You’ve probably seen products labeled “non-comedogenic.” This term means the formula is less likely to clog pores. It’s a helpful clue, but it’s not an ironclad guarantee for your unique skin. Think of comedogenic ratings as a weather forecast, not a guaranteed outcome; your skin’s unique terrain is the final deciding factor.
Some ingredients have a reputation for being more pore-clogging because of their molecular structure and how they interact with skin. Common ones include: This topic is especially relevant for lotion ingredients that stay on the skin longer. Knowing which lotion ingredients clog pores can help you pick products that support clear skin.
- Certain Heavy Oils: Coconut oil and cocoa butter are classic examples. They’re rich occlusives, which is wonderful for very dry body skin, but they can be too much for the delicate pores on your face, especially if you’re prone to congestion.
- Some Waxes: Ingredients like lanolin or some synthetic waxes can create a thick film that traps dead skin cells and sebum underneath.
- Oily or Heavier Silicones: Not all silicones are problematic. Lightweight, volatile ones (like cyclopentasiloxane) often evaporate. It’s the heavier, oily-feeling types (like dimethicone at high concentrations) that can sometimes contribute to clogging for acne-prone individuals.
My client Noah, with his dry but reactive skin, learned this the hard way with a “natural” night cream. The ingredient list was beautifully simple, but it was built on a base of rich shea and cocoa butter. After three nights, he had tiny, stubborn clogs along his jawline. The need for careful testing is highest with any rich cream, oil-based serum, or heavy makeup primer, even if the ingredient list looks perfectly “clean” or is marketed as safe for acne. For acne-prone or sensitive skin, consider non comedogenic moisturizers to hydrate without clogging pores. These products are formulated to reduce the risk of breakouts while maintaining moisture. Your skin’s opinion is the only one that matters.
The Golden Rules for Testing Anything New
Let’s answer the two most common questions right away. First: should you patch test every single new product? Yes, absolutely. Every serum, moisturizer, sunscreen, and foundation. Second: can you test multiple new things at once? No, you must test them one at a time. Introducing several new variables is a recipe for confusion-you’ll never identify the true culprit if a reaction occurs.
I frame this for my clients not as a tedious chore, but as the most respectful science experiment you can run on your own skin. It’s a sign of care, not caution. Here is your practical, step-by-step protocol.
Step 1: Choose Your Test Site. The best area is a small, discreet patch on your jawline near your ear or on the side of your neck. This skin is sensitive and a good proxy for your facial skin, but any reaction will be easy to conceal.
Step 2: Apply a Small Amount. Use exactly the amount you would use on your face. Apply it cleanly to the test patch twice a day, as part of your morning and evening routine.
Step 3: Wait and Observe. You need a full 72 hours, and up to a week for slower-forming clogs. Look for:
- Immediate redness, stinging, or itching (signs of irritation or allergy).
- Delayed small bumps, whiteheads, or deep, painful cysts (signs of a comedogenic reaction).
If your test patch remains perfectly clear, calm, and happy after the testing period, you can confidently apply the product to your full face. This methodical approach is the smartest investment you can make in your skin’s long-term health and clarity, saving you from the frustration of a full-face flare-up. It turns guesswork into a clear, confident decision.
Your Patch Testing Questions, Answered
Should I really patch test every single new product?
Yes, without exception. This includes every moisturizer, serum, sunscreen, and makeup item, as even products labeled “non-comedogenic” can still clog your unique pores. Consistent testing, like evaluating a product’s comedogenicity, is the most reliable habit for long-term skin clarity.
Can I patch test multiple new products at the same time?
No, you must test them one at a time. Introducing multiple variables makes it impossible to identify the true culprit if a reaction occurs, turning a simple safety check into a confusing experiment.
What’s my first move if I see a positive reaction?
Stop using the product immediately and gently cleanse the area. Return to your simple, trusted routine to let your skin clear the clog calmly, avoiding aggressive scrubbing which can worsen inflammation.
Your Skin’s Personal Peace of Mind
Patch testing is your most powerful tool for avoiding painful, pore-clogging reactions. Think of it as a conversation with your skin before you make a big commitment, saving you time, money, and frustration down the line. I’ve seen clients like Noah transform their cautious approach into real confidence by making this a non-negotiable habit.
- Always test new products on a small area like behind your ear or inner forearm for at least 24-48 hours.
- Introduce only one new product at a time so you can clearly identify what causes a reaction.
- Keep a simple note on your phone or in a journal to track what you tested and how your skin responded.
- Remember, this step is for every skin type-not just those who consider themselves sensitive.
If you’re ever unsure about a reaction or need help decoding an ingredient list, you’re not alone. I welcome your questions and stories about your patch testing experiences, as sharing what we learn helps everyone build better routines. You can always find more practical guidance right here on the blog. Here’s to smarter, happier skin.
Further Reading & Sources
- How to Patch Test a Skincare Product the Right Way.
- How To Do A Patch Test For Skincare | Misumi Skincare – Misumi Luxury Beauty Care
- How to Patch Test Skincare Products to Avoid 3 Possible Skin Reactions
- r/SkincareAddiction on Reddit: I just learned how to do a test patch properly! Read on for the best areas!
- r/SkincareAddiction on Reddit: Frustrated with test patching, comedogenicity when finding safe products [acne]
- What Does Non-Comedogenic Really Mean? The Truth About Pore-Clogging Products
- The Right Way to Patch Test Skincare Products: A Dermatologist-Approve – SkinInspired
- How to Patch Test Skincare: Step-by-Step Guide
Lucy is an expert author and blogger when it comes to skin care and body care. She has first hand expertise acting as skin care consultant for over 5+ years helping her clients achieve smooth blemish free skin with natural and working remedies. She also has been an avid experimenter and tried out all the natural and artificial remedies and treatments so you can learn from her first hand experience. Additionally, she has traveled to many countries around the world and incorporated the skin care routines she has learnt into this blog. So, wait no more, reach out to Lucy if you have any specific needs and follow her blog, LuciDerma for expert skin care advice.