
Adapalene Gel: The Right Order and Timing for Your Skin Care Routine
If you’re puzzling over whether adapalene gel goes before or after moisturizer, I’ve guided many clients through this exact decision. Getting the order and timing right can transform this treatment from a source of frustration into a reliable ally for your skin.
By the end of this article, you will know:
- The proven application order that balances adapalene’s effectiveness with your skin’s comfort.
- Exactly how long to wait between steps to minimize irritation and let each product do its job.
- How to adjust this routine if your skin is oily like Maya’s, dry like Noah’s, or combination like Lina’s.
You’re about to gain the clarity to use adapalene with confidence.
What Is Adapalene and Why Is Order So Important?
Adapalene is a type of retinoid, a vitamin A derivative. Think of it as a gentle but firm coach for your skin cells. It works by encouraging them to turn over at a faster, more regular pace. This process helps to keep pores clear, smooth texture, and fade marks left behind by old breakouts.
It’s crucial to remember that adapalene is a treatment, not a moisturizer. Its job is to change your skin’s behavior, not to hydrate it. Where you place it in your routine directly controls how much of it gets absorbed and, therefore, how your skin reacts.
Getting the order wrong can lead to needless irritation. Getting it right helps your skin adapt smoothly. A good analogy is caring for a plant. You can pour fertilizer directly onto dry soil for a potent effect, or you can water the soil first to dilute and buffer that fertilizer, protecting the roots. Both methods feed the plant, but one is gentler.
Should You Apply Adapalene Before or After Moisturizer? The Simple Answer
It depends entirely on your skin’s tolerance. There is no single right way for everyone, only the right way for your skin right now. Your goal is to find a method that is effective but comfortable enough that you’ll use it consistently.
You have two main options: the Direct Method and the Buffer (or Sandwich) Method.
The Direct Method: For Tolerant Skin
This is the traditional approach. After cleansing, you pat your skin completely dry and wait a minute or two. Then, you apply a pea-sized amount of adapalene gel all over your face, avoiding the immediate eye and lip areas.
Applying adapalene to clean, dry skin allows for the most direct and even absorption, which can mean more noticeable results. Keeping to a consistent nightly application time supports steady efficacy while reducing irritation. Allowing the gel or cream to dry completely before applying moisturizer or sunscreen can help minimize stinging and improve comfort. I recommend this method for someone like my client Maya, whose oily, acne-prone skin has already adjusted to retinoids, or for anyone who has used adapalene for several months without dryness or stinging.
The Buffer Method: For Sensitive or New Skin
If your skin is sensitive, reactive, or you’re just starting out, this method is your best friend. Here, you apply your moisturizer to damp skin first, wait for it to dry completely (about 10-15 minutes), then apply your adapalene gel.
That initial layer of moisturizer acts as a protective buffer. It doesn’t block the adapalene, but it does slow and gentle its delivery into the skin. This dramatically reduces the classic side effects of redness, peeling, and that uncomfortable tight feeling.
Buffering may slightly delay visible results, but it drastically improves your ability to stick with the treatment long-term, which is what truly matters. This is the exact strategy I set up for Noah, who has dry, reactive skin. His primary concern was maintaining a healthy skin barrier, so we used a simple, fragrance-free moisturizer as a protective base. It allowed him to use adapalene every other night without a single flare-up, which he never thought was possible.
How Long Should You Wait Between Adapalene and Moisturizer?
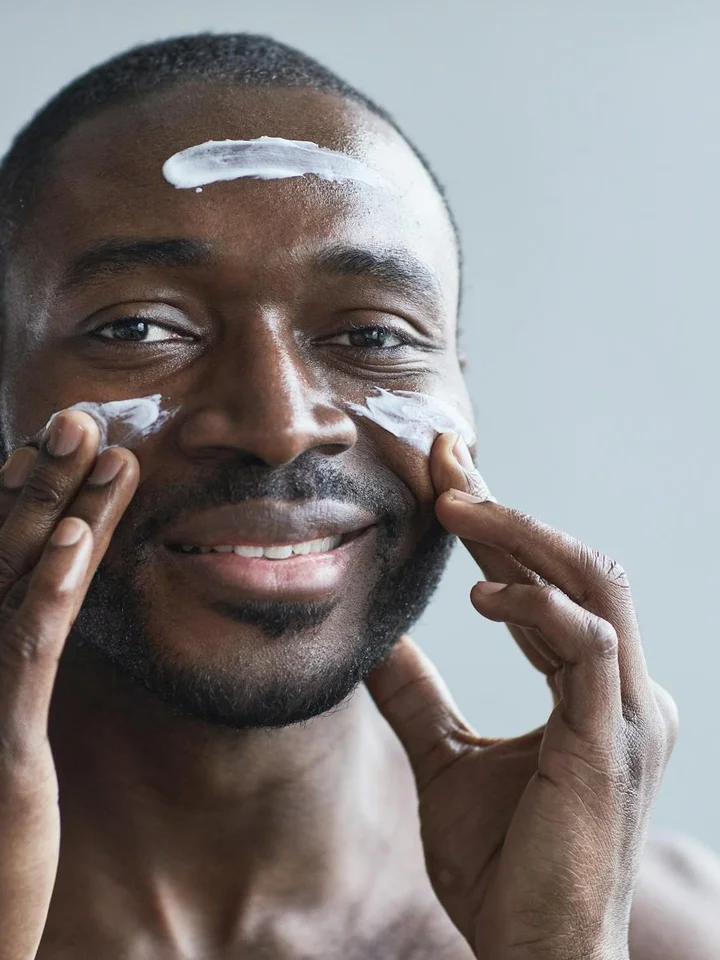
Whether you ask “how long after adapalene can I apply moisturizer” or “should I wait between layers,” the answer shapes your routine’s comfort and success. The wait time isn’t just a suggestion, it’s a key part of managing your skin’s response, but it’s also essential to debunk some skincare layering myths about waiting times.
For the Direct Method-applying adapalene directly to clean, dry skin-I advise a wait of 15 to 20 minutes before smoothing on your moisturizer. This gives the treatment time to absorb properly into the skin where it needs to work. Keep this step in mind as you aim to integrate adapalene skincare routine into your daily regimen. The next steps will show how to weave it with other products for a cohesive routine.
Letting the adapalene gel absorb fully helps minimize pilling and reduces potential irritation by preventing it from being diluted or spread around. If irritation occurs, simple measures to manage adapalene irritation can help. See the next steps for quick tips to keep skin calm while using it.
For the Buffer Method, the timing shifts. Here, you apply a first layer of moisturizer on damp skin after cleansing. You only need to wait about 5 minutes, or just until that moisturizer feels fully absorbed and your skin is dry to the touch. Then, apply your adapalene. This shorter wait lets the moisturizer create its protective base without leaving a wet film that could intensify the retinoid’s effects unevenly.
How to Build Your Nightly Routine with Adapalene
Consistency is your best tool with any retinoid. Here is a simple, step-by-step nightly plan you can adapt for either application method. My client Noah, who has reactive skin, started with the buffer method and found it made all the difference in comfort, especially when using the right retinol percentage for sensitive skin.
Your Evening Routine Flowchart
- Cleanser: Use a gentle, non-stripping formula to remove sunscreen and impurities. Pat your face dry with a clean towel.
- Optional Toner or Essence: If you use one, apply it now to slightly damp skin. Look for soothing, hydrating ingredients.
- The Application Crossroads:
- For the Buffer Method: Apply your moisturizer to damp skin. Wait ~5 minutes until skin is completely dry.
- For the Direct Method: Proceed directly to the next step on dry skin.
- Adapalene: Take a pea-sized amount for your entire face. Dot it on your forehead, cheeks, nose, and chin, then gently blend outward. Avoid the delicate skin right around your eyes and lips.
- Wait Time: Set a timer for 15-20 minutes. Use this time to brush your teeth, read, or prepare for the next day.
- Final Moisturizer: Apply your moisturizer again. This final layer seals in everything and provides crucial overnight hydration to support your skin barrier.
Your morning routine must include a broad-spectrum sunscreen rated SPF 30 or higher-this is non-negotiable. Adapalene makes your skin more sensitive to the sun, and daily sunscreen is the best way to protect your progress and prevent dark spots.
If you’re new to adapalene, begin with the Buffer Method 2-3 nights a week. You can gradually increase frequency or switch to the Direct Method as your skin builds tolerance. Listen to your skin, like my client Maya did, it will tell you what it needs, especially when it comes to frequency of use.
What to Mix & What to Avoid: Your Adapalene Interaction Matrix

Think of your skincare routine as a team. You want players that work together, not against each other. Adapalene is a star player, but it needs the right teammates.
Here is a simple guide to what mixes well and what to sideline.
Team Players (The “Yes” List)
These ingredients support your skin’s health while you use adapalene. They are like a good coaching staff.
- Niacinamide: This is adapalene’s best friend. It helps calm redness, strengthens your skin’s barrier, and regulates oil. Using them together can make the initial adjustment period smoother.
- Ceramides, Hyaluronic Acid, and Peptides: These are hydrating and reparative ingredients. They act like a repair crew, reinforcing your skin’s moisture barrier which adapalene can temporarily challenge. Look for them in your moisturizer.
- Zinc Oxide (Sunscreen): Non-negotiable. Adapalene makes your skin more sun-sensitive. A gentle, mineral-based sunscreen with zinc oxide is protective and rarely irritating.
Proceed with Caution
These ingredients can be used, but not at the same time as your adapalene. Space them out.
- Vitamin C (L-ascorbic acid): Both are effective, but using them together can increase irritation. I recommend using vitamin C in your morning routine and adapalene at night.
- Other Exfoliating Acids (AHA/BHA/PHA): Like benzoyl peroxide or salicylic acid. Using these on the same night as adapalene is a common recipe for a red, angry face. If you need both, use the acid in the morning or on alternate nights.
The Avoid List
Skip these on the nights you use adapalene. They are too much for most skin to handle simultaneously.
- Physical Scrubs or Cleansing Brushes: Your skin will be exfoliating itself from within with adapalene. Adding physical abrasion damages your barrier.
- Other Prescription Retinoids (Tretinoin, Tazarotene): Never layer prescription retinoids. You are only asking for severe irritation without extra benefit.
- Harsh, Drying Toners (especially with high alcohol): These strip your skin when it needs compassion and moisture most.
Formulation Pro-Tip: Gels vs. Creams & Texture Timing
The vehicle matters. Adapalene comes in different textures, and that changes how you might schedule your wait time.
Gel formulations often have a lighter, alcohol-based feel. They are designed to dry down quickly. For someone like my client Maya with oily skin, a gel might feel preferable. Because it dries fast, you may only need to wait a minute or two for it to absorb before applying moisturizer.
Cream formulations are more emollient. They contain more moisturizing ingredients and feel richer. For someone like Noah with dry skin, this can be a better choice. However, creams take longer to fully absorb into the skin. You might want to wait a full 5-10 minutes after applying a cream adapalene before layering your moisturizer on top.
The goal is to let the active ingredient settle into your skin without being immediately diluted or moved around by your next step.
What If My Skin Reacts? Troubleshooting Adapalene
Some reaction is normal. Your skin is learning to behave in a new way. But there’s a difference between an adjustment period and outright distress.
Normal “Retinization” vs. Signs of Overuse
In the first 2-6 weeks, expect some mild flaking, dryness, or a bit of pinkness. This is “retinization” – your skin is adapting. It should be manageable and not painful.
If you experience stinging, burning, intense redness, severe dryness, or itchy eczema-like patches, you are likely using too much, too often. Your skin barrier is waving a white flag.
The Step-Back Protocol
If your skin is complaining, listen to it. Here is your action plan.
- Pause adapalene for 2-3 nights. Focus only on gentle cleansing, a soothing moisturizer with ceramides, and sunscreen.
- Restart with the Buffer Method. Apply your moisturizer to damp skin first, wait 20 minutes, then apply a pea-sized amount of adapalene. This buffers the intensity.
- Reduce frequency. Switch from every night to every third night, then slowly work up to every other night as your skin tolerates it.
- Never use more than a pea-sized amount for your whole face. More is not better, it’s just more irritating.
My client Lina went through this. She started adapalene every other night and her combination skin rebelled with redness on her cheeks. We had her pause, then restart with the Buffer Method just twice a week. Within two weeks, her skin acclimated without the angry reaction, and she could slowly increase frequency.
Your skin’s comfort is the ultimate guide. Pushing through pain never leads to better results, only a more damaged barrier that takes longer to heal.
Your Quick Adapalene Order & Timing Questions
Why does the wait time between steps matter so much?
Waiting allows the adapalene to absorb properly into your skin, which maximizes its effectiveness and minimizes potential irritation or pilling. Think of it as letting each product set before adding the next layer for a clean, comfortable result.
What should I do if my skin still feels irritated even when I buffer?
This is your skin’s signal to pull back and simplify. Pause adapalene for a few nights to let your barrier recover, then reintroduce it just 1-2 times a week using the buffer method, ensuring you’re using only a pea-sized amount.
Can I use my other treatment serums, like vitamin C, with adapalene?
Yes, but not at the same time. To avoid overwhelming your skin, use your antioxidant serums like vitamin C in the morning and reserve adapalene for your nighttime routine. This separation keeps your skin effective and comfortable.
Final Thoughts on Adapalene and Your Routine
Getting your adapalene order right is about balancing effectiveness with comfort for your unique skin. Choose the method that keeps your skin calm and consistent-moisturizer first for sensitive or new users, adapalene first for seasoned retinoid fans, always with a patient wait in between. Think of how adapalene fits into a full skincare routine by pairing it with moisturizers, cleansers, and serums for comfort and effectiveness. We’ll cover skincare routine product combinations with adapalene in the next steps.
- Always apply adapalene to clean, completely dry skin to prevent irritation.
- Start with moisturizer first if your skin feels reactive, like Noah’s often does.
- Wait 20 to 30 minutes after cleansing before adapalene, and before moisturizer if buffering.
- Use a pea-sized amount for your whole face to avoid over-drying or peeling.
- Stick with it nightly and never forget daytime sunscreen, as retinoids make skin sun-sensitive.
Your skin’s journey with adapalene is personal, much like how Maya and Lina adjusted their routines based on tolerance. If you’re curious about how adapalene and retinol can fit into a routine, you’re not alone. We’ll cover practical tips and safety in upcoming posts. For deeper dives into retinoid care or other skin puzzles, explore more on our blog—your questions and stories help us all learn better, kinder ways to care for our skin.
Research and Related Sources
- Differin Gel (Adapalene) for Topical Acne: a Patient Guide
- Differin
- Adapalene for acne treatment: how it works, benefits, side effects
- Adapalene Before & After: How It Works, Benefits & Results – SkinLab
- Adapalene (topical route) – Side effects & dosage – Mayo Clinic
- How to Use Adapalene, According to a Dermatologist | Skincare.com powered by L’Oréal
- r/Skincare_Addiction on Reddit: I just bought Adapalene gel. Should I use it AM or PM and what step should it be in my current routine
Lucy Zimmerman
Lucy is an expert author and blogger when it comes to skin care and body care. She has first hand expertise acting as skin care consultant for over 5+ years helping her clients achieve smooth blemish free skin with natural and working remedies. She also has been an avid experimenter and tried out all the natural and artificial remedies and treatments so you can learn from her first hand experience. Additionally, she has traveled to many countries around the world and incorporated the skin care routines she has learnt into this blog. So, wait no more, reach out to Lucy if you have any specific needs and follow her blog, LuciDerma for expert skin care advice.